


If you want clean, smooth, and professional stitching results, you have to understand one thing clearly: Digitizing for Embroidery isn’t just about converting an image into stitches. It’s an art. A combination of technical skills, creativity, and attention to detail. Whether you’re running an embroidery business or working as a hobbyist, proper digitizing can make or break your final output. In this guide, we’ll break down the essential tools, techniques, and tips you need to digitize like a pro.
What Is Digitizing for Embroidery?
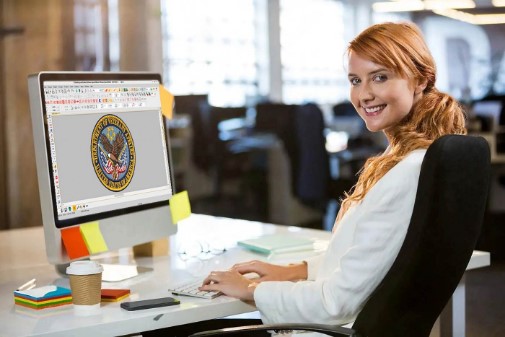
Digitizing for embroidery is the process of taking a digital image like a logo, artwork, or sketch and converting it into a stitch file that embroidery machines can read.
The machine doesn’t understand pixels. It only understands stitches, angles, and coordinates. That’s why digitizing is such an important step.
A well-digitized design ensures:
- Smooth lines
- Clean edges
- Proper density
- Dense areas don’t cause thread breaks
- Stitches run efficiently
A poorly digitized design?
Expect puckering, thread breaks, uneven fill, and wasted fabric.
Why Professional Digitizing Matters
Many beginners assume any software can automatically convert an image into stitches. Technically, yes auto-digitizing exists. But the results? Not so great.
Professional digitizing ensures:
Clean & Accurate Stitch Placement
Every stitch has a purpose. Proper digitizing improves clarity and reduces distortion.
Correct Underlay
Underlay stabilizes stitches. Without it, designs pucker or shift.
Right Density & Pull Compensation
Fabric stretches (pulls) during stitching. Compensation prevents distortion.
Smooth Pathing
Smart sequencing prevents unnecessary jumps and trims.
Machine-Friendly Files
Different machines require different formats like DST, PES, EXP, JEF, or PXF.
A professional digitizer knows exactly what each machine needs.
Essential Tools for High-Quality Embroidery Digitizing
To digitize like a pro, you need the right tools. Here are the essentials:
1. Digitizing Software
This is your main weapon. Popular options include:
- Wilcom
- Hatch
- Embird
- Pulse
- Chroma
- PE-Design
- Ink/Stitch (Free)
Look for features like stitch editing, auto-underlay, density control, and multiple file export options.
2. A Reliable Computer
Embroidery digitizing is graphic-heavy. A system with good RAM and processing power helps you work smoothly.
3. Graphics Tools
A clean design gives better digitizing results. Software like:
- Adobe Illustrator
- CorelDRAW
helps you refine artwork before importing.
Embroidery Machine for Testing
No digitizing is complete without a test sew-out.
Testing helps you evaluate:
- Stitch quality
- Density
- Movement of fabric
- Thread cutting issues
Test → adjust → repeat until perfect.
Step-by-Step: How Professional Digitizing Works
Let’s break down the actual process of digitizing to understand how pros achieve outstanding results.
Step 1: Analyze the Artwork
Before placing a single stitch, you must study the artwork.
Ask yourself:
- Is the artwork too detailed?
- Are the lines too thin?
- Will small text be readable?
- Does it need simplification?
Embroidery has limitations. Small details often need modification.
Step 2: Prepare/Refine the Design
This includes:
- Removing background
- Adjusting contrast
- Thickening thin lines
- Separating overlapping areas
- Simplifying complex shapes
The cleaner the artwork, the better the digitized output.
Step 3: Choose the Right Stitch Types
Embroidery uses different stitches based on shape, size, and material.
• Satin Stitch
Perfect for borders, letters, and smooth curves.
• Fill Stitch
Used for large areas or shapes.
• Run Stitch
Used for outlines, details, and trace paths.
A professional digitizer knows when to use which stitch.
Step 4: Apply Underlay Stitches
Underlay gives stability to the top stitches.
Common underlay types:
- Center walk
- Edge run
- Zigzag underlay
Each type serves different purposes depending on fabric and design.
Step 5: Adjust Density & Pull Compensation
Fabric stretches, needles push, and stitches tighten.
This movement affects the final output.
Correct density ensures the design looks filled but not bulky.
Pull compensation prevents distortion on curved or narrow shapes.
Step 6: Set Pathing & Sequencing
Pathing determines the stitch order.
Good pathing:
- Reduces trims and jumps
- Prevents thread breaks
- Speeds up machine time
Smart sequencing is the secret to efficient embroidery.
Step 7: Export the File Format
Each machine requires a specific file format:
- Tajima – DST
- Brother – PES
- Barudan – DSB/U??
- Melco – EXP
- Pfaff – PXF
A professional ensures the design is exported correctly based on customer needs.
Step 8: Test Sew-Out
The final and most important step.
A test sew-out helps catch issues like:
- Wrong density
- Gaps in stitching
- Overlaps
- Underlay problems
- Poor thread trimming
Only after testing is the design considered “machine ready.”
Pro Tips for Better Digitizing
Here are some practical tips to take your digitizing to the next level:
Avoid Too Much Density
Overly dense stitches damage fabric and cause thread breaks.
Don’t Use Satin on Large Areas
Satin over 12mm can snag. Switch to fill stitches.
Keep Text Above Minimum Size
Small text (below 4–5mm) loses clarity. Block fonts work best.
Choose Fabric-Friendly Settings
Denim, leather, polo shirts, and caps all need different digitizing approaches.
Always Run a Test
Even experienced digitizers test every file.
Common Mistakes Beginners Make
Want to avoid frustration? Here’s what NOT to do:
- Relying only on auto-digitizing
- Ignoring fabric type
- Using the same density for every design
- Skipping underlay
- Forgetting pathing
- Ignoring push/pull effects
Mastering digitizing means practicing, testing, and improving consistently.
Why Outsourcing Professional Digitizing Can Help
Learning digitizing takes time and consistent practice.
Many brands and businesses prefer outsourcing because:
- It saves time
- It ensures consistent quality
- Professionals handle complex designs
- You get machine-ready files faster
- No need to invest in costly software
If you run a business, outsourcing gives you both speed and accuracy.
Conclusion
Digitizing for embroidery is a skill that blends creativity with precision. Using the right techniques, tools, and practices ensures your final embroidery comes out clean, smooth, and professional. Whether you’re digitizing in-house or outsourcing to experts, mastering the fundamentals is the key to producing stunning stitch results.
And if you ever need expert help, Absolute Digitizer is always ready to handle your digitizing projects with accuracy and care.