


When it comes to creating homemade chocolates, choosing the right mold is essential. Whether you’re a professional chocolatier or a hobbyist, the mold you select can significantly impact the quality and appearance of your chocolate bars. In this guide, we’ll walk you through how to pick the best custom chocolate bar mold for your needs, ensuring your creations look and taste perfect.
1. Consider the Material of the Mold
The material of your mold plays a big role in how easy it is to use and how your chocolate turns out. There are several options available, including:
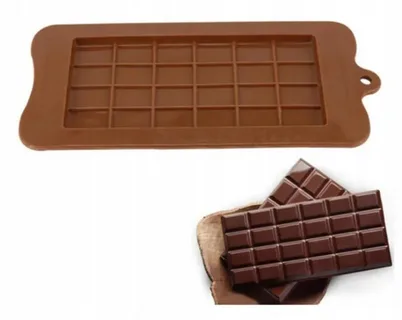
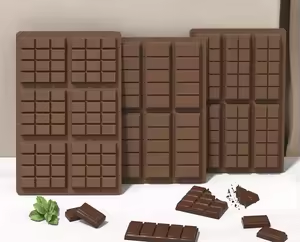
- Silicone Molds: These are flexible and easy to remove your chocolate from. They are great for beginners and professionals alike, as they allow for clean release and come in various shapes and sizes.
- Polycarbonate Molds: Known for producing high-quality chocolates with a professional finish, polycarbonate molds are rigid and provide sharp, clean lines on your chocolates. They are more durable but can be harder to clean compared to silicone molds.
- Metal Molds: These molds are less common but can provide excellent results for specialty chocolates. They tend to be more durable but may require some experience to handle correctly.
2. Determine the Size and Shape of the Mold
Custom chocolate bar molds come in a variety of shapes and sizes. Whether you’re making traditional chocolate bars, themed designs, or something more intricate, you need to select a mold that fits your needs.
- Standard Chocolate Bars: These molds are rectangular, allowing you to create uniform chocolate bars that are perfect for packaging or gifting.
- Themed Molds: If you’re making chocolates for a special occasion or event, look for molds with specific shapes, such as hearts, stars, or holiday-themed designs.
- Mini and Custom Molds: For small or bite-sized chocolates, mini molds are ideal. Additionally, many companies offer custom molds where you can create your own unique design.
3. Evaluate the Mold’s Durability and Ease of Use
A mold’s durability is crucial, especially if you’re using it frequently. High-quality molds will last for many uses without losing their shape or functionality. Silicone molds, for instance, are known for their flexibility and long lifespan. They can withstand both freezing and baking temperatures, making them versatile.
Ease of use is another consideration. Molds that are too stiff or difficult to clean can become frustrating over time. When choosing a mold, ensure it’s easy to handle and clean, which will save you time in the long run.
4. Look for a Non-Stick Surface
Non-stick molds are essential for ensuring your chocolate bars come out easily without breaking. Silicone molds often have a naturally non-stick surface, making them a popular choice. Polycarbonate molds may require a light coating of oil or butter before use to prevent sticking.
A non-stick surface not only makes the chocolate removal process smoother but also helps maintain the shape of your creations, particularly if you’re using intricate designs.
5. Check for Heat Resistance
If you’re planning to work with warm or melted chocolate, make sure your mold can handle the heat. Silicone molds, for example, are typically heat-resistant and can be used to make chocolates with tempered chocolate. Polycarbonate molds also handle heat well, but they may require a bit more care, as they are more rigid.
Always check the manufacturer’s guidelines to make sure the mold can withstand the temperatures you’ll be working with.
6. Customizing Your Mold for Personal Use
If you’re looking to create chocolates that are truly unique, consider custom chocolate bar molds. These molds can be personalized with logos, special designs, or even your own custom shape. Custom molds are perfect for businesses that want to promote their brand through their chocolate products.
To ensure your design translates well into chocolate, consult with a mold manufacturer who can guide you through the process of creating a mold that will meet your needs.
7. Consider the Type of Chocolate You Plan to Use
Different types of chocolate require different mold materials. For example, if you’re using chocolate with a high cocoa butter content, silicone molds might be more suitable because they allow for smooth chocolate release. On the other hand, if you’re working with a dense chocolate or hard candy coating, polycarbonate molds could provide better results.
8. Gummies Sticking to Silicone Mold
If you’re planning to make gummies sticking to silicone mold or other chewy treats in addition to chocolates, you’ll need a mold that works well with both types of recipes. Gummies can sometimes stick to silicone molds, making the removal process a little tricky. To avoid this, lightly dust your silicone molds with cornstarch or powdered sugar before pouring in the gummy mixture. This will help prevent sticking and make the extraction process easier.
9. Price and Availability
Finally, consider your budget and where you can purchase the mold. While high-quality molds can be an investment, they pay off in the long run by producing better results and lasting longer. Look for reputable sellers or manufacturers that offer competitive prices and provide detailed product information.
Some online shops also offer mold bundles, so if you’re just starting out, you may want to consider purchasing a set that includes several sizes and shapes to experiment with.
Conclusion
Choosing the right custom chocolate bar mold can seem overwhelming, but with the right information, it becomes much easier. Consider factors like material, size, shape, and ease of use to ensure you pick the best mold for your chocolate-making needs. With the right mold in hand, you’ll be well on your way to creating delicious, beautifully shaped chocolate bars that stand out from the rest.